
Attention! Before removing the engine, read the entire section on removing the engine.
Attention! Since the vehicle is equipped with an airbag that may deploy when working with the battery connected, disconnect the battery and wait at least 90 seconds for the capacitor in the airbag control system to discharge.
Attention! If your radio has an anti-theft code, check that you have the pairing codes before disconnecting the battery.
Attention! On models since 1993, the airbag system is disabled if the battery is disconnected for an extended period. If the airbag warning light comes on and stays on after reconnecting the battery, take it to a specialist workshop to restore the system to normal.
Removing
1. Relieve the pressure in the fuel system.
2. Remove the ground wire from the battery.
3. Remove the battery and battery stand.
4. Remove the protective cover on the fenders and hood and remove the hood.
5. Remove the air filter cover.
6. Raise the vehicle and secure it on stands. Drain the coolant from the cooling system and engine oil. Remove drive belts.
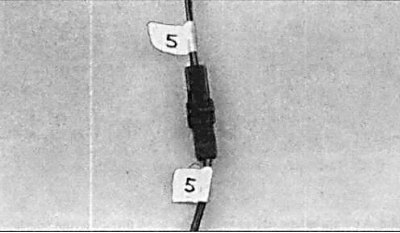
7. Tag, then disconnect all vacuum lines, hoses, electrical connectors, ground straps, and fuel lines.
8. Remove the windshield washer fluid reservoir and expansion tank.
9. Remove the radiator fans, shroud and radiator.
10. Disconnect the coolant supply hoses to the heater.
11. Remove residual pressure in the fuel tank by removing the filler cap, then disconnect the fuel lines from the engine and plug them.
12. Disconnect the throttle control cable and transmission control linkage.
13. Remove the wiring harness from the mounting brackets to the front and left side of the engine and transmission.
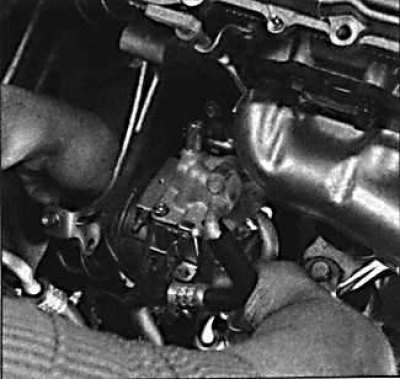
14. On vehicles with power steering, unscrew the power steering pump mounting bolts and move it to the side without disconnecting the hoses.
15. On models with an air conditioning system, unscrew the air conditioning compressor mounting bolts and move it to the side without disconnecting the hoses, and using a soft wire, tie it to the body.
16. Disconnect the exhaust pipe from the manifold.
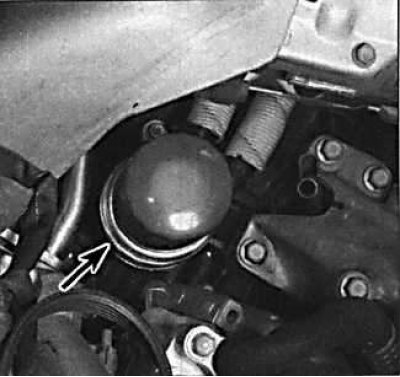
17. On four-cylinder models equipped with an oil cooler installed between the oil filter and the cylinder block, remove the oil filter and disconnect the hoses from the oil cooler.
18. Hook the engine with the hoist straps and raise the engine just enough so that the top of the engine is supported by the hoist.
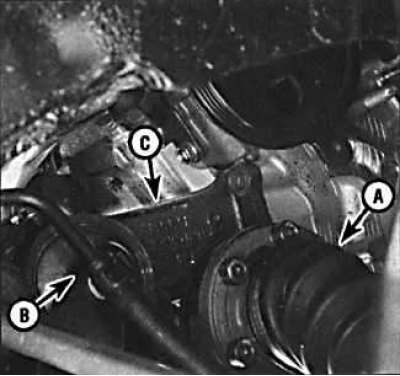
19. Remove the right suspension bracket of the power unit. To remove the right suspension of the power unit, remove the hinge (A), unscrew the pinch bolt (IN) and remove the suspension of the power unit (WITH).
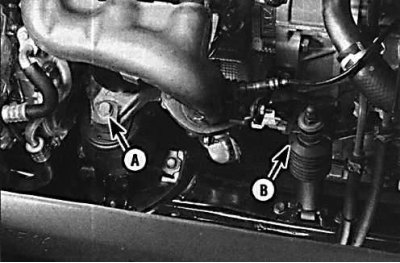
20. Unscrew the bolt securing the suspension of the power unit (A) to the body from the side of the radiator.
21. On automatic transmission models, remove the torque converter guard plate from the front of the transmission. Disconnect the torque converter from the drive plate and move it to the gearbox housing.
22. Unscrew the bolts securing the gearbox to the engine and separate the engine from the gearbox, while the torque converter should remain in the gearbox housing. If the engine is removed together with the gearbox, do not unscrew the bolts securing the gearbox to the engine, but disconnect the drive shafts, wires, hoses, gear shift cable and speedometer cable from the gearbox.
23. Check that nothing but the engine mounts is connecting the engine and gearbox to the car body.
24. Support the gearbox with a jack over a block of wood. Unscrew bolts of fastening of supports of the power unit.
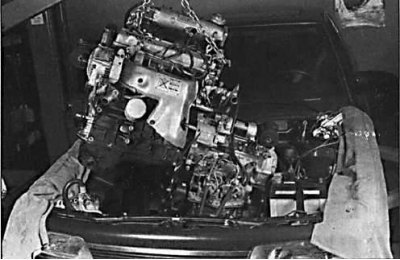 |  |
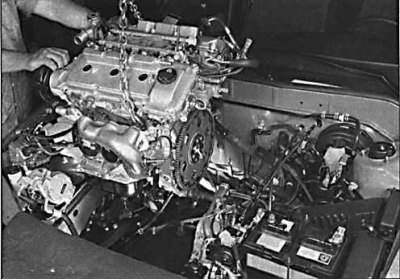
25. Slowly lift the power package out of the engine compartment.
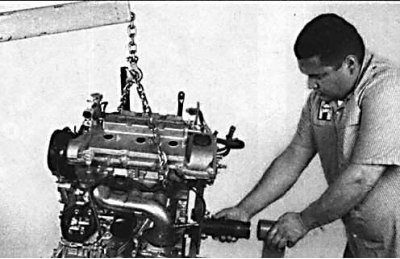
26. Move the engine away from the vehicle and lower it on wooden stands to the floor, or remove the flywheel/drive plate and mount the engine on a suitable stand.
Installation
Attention! Do not use bolts to align the gearbox with the engine. This can result in splitting or damage to large engine components.
1. Check the condition of the engine and transmission mounts. If they are worn or damaged, replace them.
2. On manual transmission models, check the condition of the clutch. On models with automatic transmission, check the condition of the O-ring and bushing.
3. On manual transmission models, lubricate the bearing at the end of the crankshaft with a small amount of high temperature grease. On automatic transmission models, lubricate the nose of the converter with high temperature grease.
4. Being careful, establish a transmission on the engine.
5. Fasten the gearbox to the engine with bolts, tightening them to the required torque.
6. Using a hoist, lower the engine together with the gearbox into the engine compartment. When installing the power package, if necessary, tilt and rotate it so that it is installed in place without causing harm.
7. Install the power unit suspension mounting bolts and tighten them to the required torque.
8. Install previously removed parts and restore all connections in the reverse order of removal.
9. Fill the engine with coolant, engine oil and, if necessary, add oil to the power steering reservoir.
10. Start the engine and check its operation. Stop the engine and check the level of all fluids.