
Details of fastening of the main cylinder
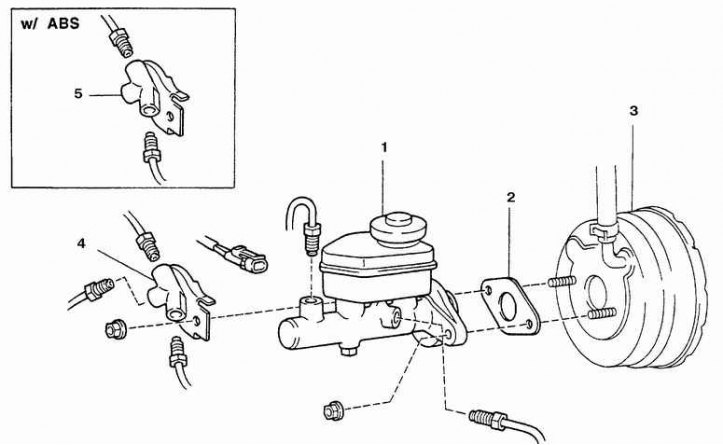
1. Master cylinder; 2. Gasket; 3. Vacuum amplifier; 4. Tee-splitter; 5. Splitter (for vehicles without ABS)
Removing
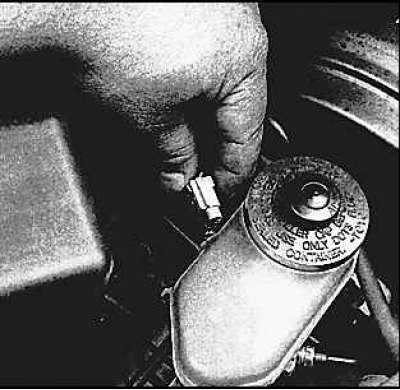
1. Disconnect the connector from the tank.
2. Remove fluid from reservoir.
3. Place a rag under the master cylinder.
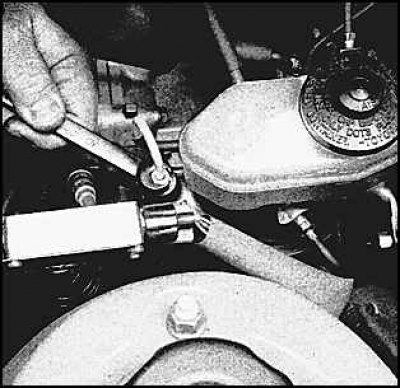
4. Turn away the union of tubes on the cylinder.
5. Remove the tubes from the fittings and take them aside.
6. Turn away nuts of fastening of the cylinder to the vacuum amplifier and remove the cylinder.
Installation
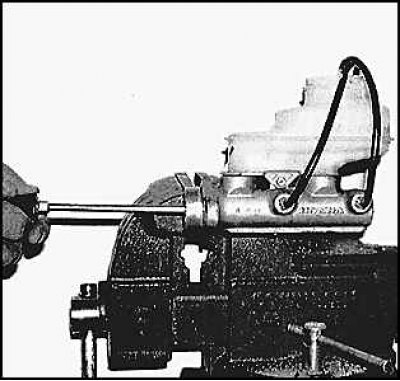
1. Remove air from the cylinder, for which clamp the cylinder in a vise by the mounting flange.
2. Screw two tubes into the cylinder, lowering them into the tank.
3. Fill the cylinder with the recommended brand of fluid.
4. Slowly push the piston in, using a large Phillips screwdriver for example, and release.
5. Repeat these steps until no more air comes out of the tubes.
6. Remove the tubes one by one, screwing the plugs in their place.
7. Reinstall the cylinder and tighten the nuts by hand.
8. Screw the fittings without distortions, manipulating the cylinder.
9. Tighten nuts and fittings.
10. Add fluid to the reservoir and bleed the air from the hydraulic actuator (see subsection 10.11.). The air from the cylinder can also be removed by car, working together. To do this, ask the assistant to press the pedal several times and hold. Unscrew the fitting and release the air. Wrap the fitting and ask the assistant to release the pedal. Continue until liquid begins to flow from the cylinder. With this method, cover the space under the cylinder with rags.
11. Check the operation of the brakes.